Finding the perfect insulation blanket is only half of the battle. If you choose the experts at Firwin to then you are off to a great start! However, without proper installation, even the highest quality insulation jackets, insulation covers, and heat shields won’t work properly and can give you a false sense of security.
To ensure your removable insulation functions properly and provides optimal heat reduction, you need to follow some important steps.
Before you begin installing our removable insulation blankets on your straight pipes, you first need a few tools:
•Stainless steel lacing wire
•Gloves
•Pliers and/or side cutters
As well, you need to know exactly where you are going install the blanket before starting. It may seem like a simple thing, but you need to be 100% sure about its placement before moving forward.
Once your tools and location are all set to go, it is time to install.
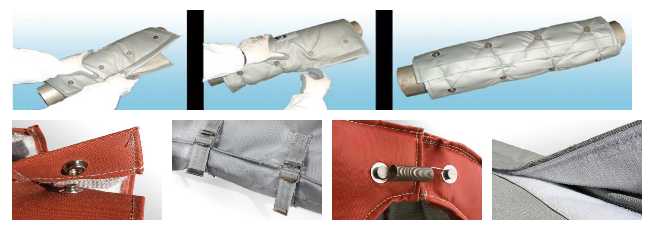
Step#1: Wrap the blanket around the pipe and form and compress the blanket while working close to the seam
Step#2 : Form a loop in the wire and hook it around the first rivet or hook
Step#3: Lace the wire across the blanket to close the seam.
Step#4: Lace entire length of the insulation blanket. After lacing the last rivet/hook, cut away lacing wire and wrap any of the excess wire around the last rivet.
On top of these four crucial steps, you must also remember that the outer material should never come in direct contact with any hot surface. As well, do not forget to inspect the blankets on a regular basis.
If you can follow these instructions, then you will be able to have confidence that your Firwin Removable Insulation Blankets will maintain peak performance. If you have any questions or need more details, please contact Firwin today.
Comments are closed